By: Levie Rufenacht – Software Architect @ IceTeaGroup
Modern enterprise security is changing with the advancement of the Web Authentication API (WebAuthn). Now that most modern browsers are supported, it’s becoming easier for developers to upgrade their authentication standards and user experience by either reducing the need for a password or providing a supplement to a password as an added layer of security.
Our team has implemented the WebAuthn API into Wisej.NET as an open-source NuGet package. Wisej.NET developers can use the methods provided by the Wisej-Ext-WebAuthn NuGet extension to retrieve credentials, generate a signature, and validate the signature using a public key supplied upon registration, all in C# or VB.NET. Implementing this API can be time-consuming in traditional client/server work environments but can be achieved easily with a few method calls in Wisej.NET.

Wisej.NET is a web framework for developing enterprise-scale web applications without ANY knowledge of HTML, CSS, or JavaScript. The framework, built on ASP.NET Core, provides developers with a powerful and diverse drag-and-drop toolset for visually designing complex enterprise forms. Wisej.NET also provides an abstraction for typical nuances like wiring a client-side click event to a server-side controller or handler. This abstraction allows developers to create complex reusable controls and forms in C# or VB.NET. Web applications built with Wisej.NET can run background tasks on the server and instantly push changes to any number of connected clients.
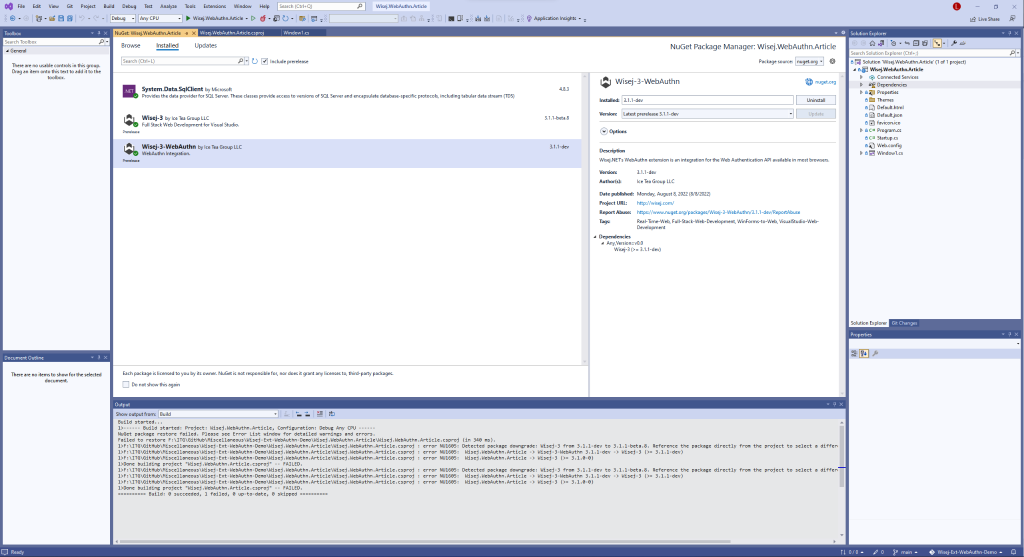
To get started with WebAuthn in Wisej.NET, install Wisej.NET from the Visual Studio Marketplace and create a new blank Wisej.NET project. After creating the new project, add the Wisej-Ext-WebAuthn NuGet package to the project.
Once the NuGet package is added, we can begin the integration. For this demo, we’ll create a Window with a simple WebAuthn workflow:
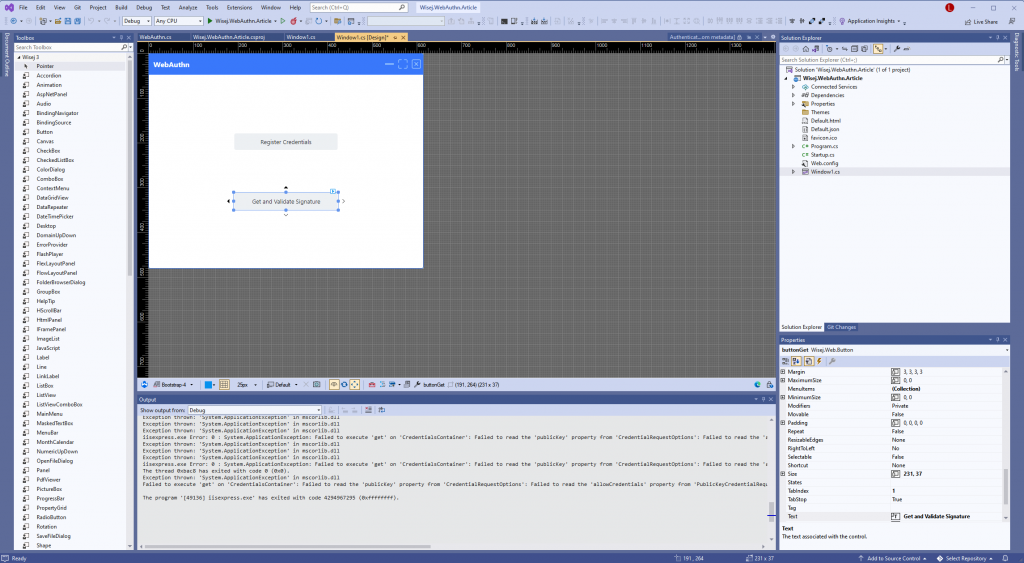
Controls can be added to a Page or Form using the Visual Studio Toolbox on the left-hand side of the screen.
After we’ve added the controls to the Window and applied a layout, we’ll add a handler for the Click event of the Register Credentials Button by double-clicking the control in the designer.
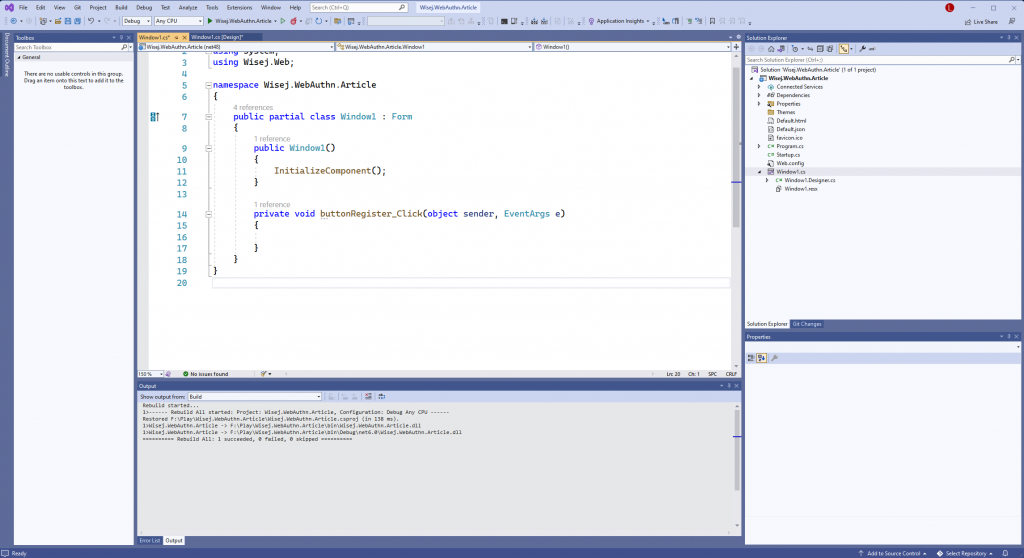
Wisej.NET automatically fires most client-side events into a stateful Wisej.NET session. In this case, the button `Click` fires on the client and is immediately routed to the current session’s `Click` handler.
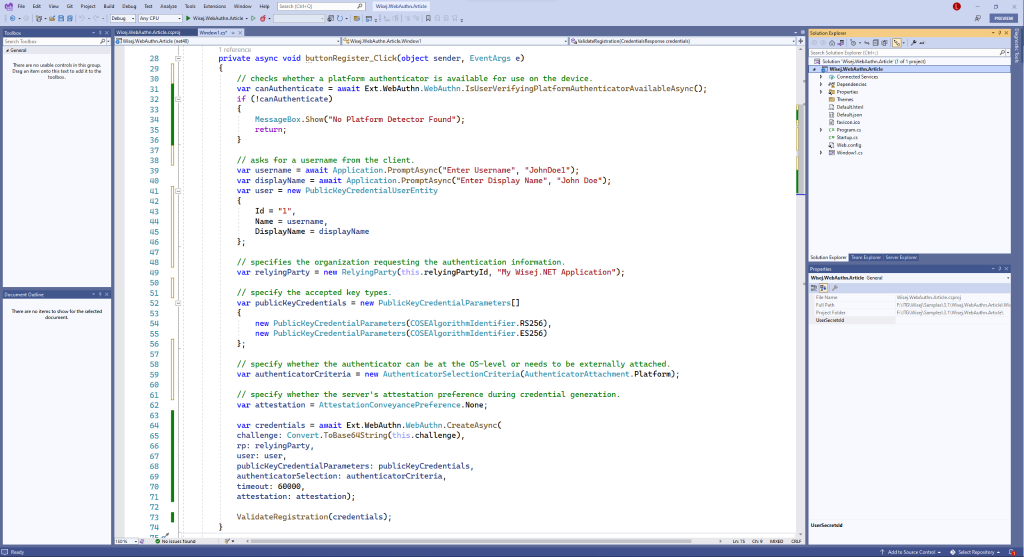
Inside the click handler, the first thing to do is verify that the user has a platform (device-based) authenticator available. This can be achieved with one call in Wisej.NET:
// checks whether a platform authenticator is available for use on the device.
var canAuthenticate = await Ext.WebAuthn.WebAuthn.IsUserVerifyingPlatformAuthenticatorAvailableAsync();
if (!canAuthenticate)
{
                MessageBox.Show("No Platform Detector Found");
                return;
}
Assuming a platform authenticator is available for use, the next thing to do is request a new set of credentials from the client. To do this, we’re going to use the Wisej.Ext.WebAuthn.WebAuthn.CreateAsync() method. The method requires several arguments:
For this demo, we’ll use GUID to generate a unique string:
/// <summary>
/// Random challenge for uniquely identifying the registration / authentication requests.
/// </summary>
private readonly byte[] challenge = Encoding.UTF8.GetBytes(Guid.NewGuid().ToString());
We’ll save it as a byte array for comparison with the challenge sent back from the client upon registration.
The relying party provides information about the organization attempting to register and authenticate the user. The Wisej.Ext.WebAuthn.RelyingParty constructor takes two arguments:
In this case, we’ll provide the relying party identifier as a Form-level variable so we can use it later for validation:
/// <summary>
/// The identifier of the relying party, usually the domain.
/// </summary>
private readonly string relyingPartyId = Application.StartupUri.Host;
We then need to apply the above value to a RelyingParty instance we can use as an argument for Create():
var relyingParty = new RelyingParty(this.relyingPartyId, "My Wisej.NET Application");
The user argument defines information about the user being registered. In this case, we can use Wisej.Ext.WebAuthn.PublicKeyCredentialUserEntity. It would look something like this:
// asks for a username from the client or get it from the DB.
var username = await Application.PromptAsync("Enter Username", "JohnDoe1");
var displayName = await Application.PromptAsync("Enter Display Name", "John Doe");
// create the PublicKeyCredentialUserEntity object.
var user = new PublicKeyCredentialUserEntity
{
                Id = "1",
                Name = username,
                DisplayName = displayName
};
Name and DisplayName are different because Name is used to uniquely identify accounts with similar display names (Learn More).
This list provides a set of key types and signature algorithms that the relying party (application) supports, ordered from most to least preferred. By default, Wisej.NET provides integrations for the RSASSA-PCKS1-v1_5 using SHA-256 (RS256) and ECDSA using P-256 and SHA256 (ES256) signing algorithms.
var publicKeyCredentials = new PublicKeyCredentialParameters[]
{
    new PublicKeyCredentialParameters(COSEAlgorithmIdentifier.RS256),
    new PublicKeyCredentialParameters(COSEAlgorithmIdentifier.ES256)
};
Other algorithms can be used, but a corresponding validation method must be implemented.
The relying party can specify how important it is to receive uniquely identifying information about the client (Learn More).
In this case, we’re not going to request any attestation data from the authenticator
var attestation = AttestationConveyancePreference.None;
Depending on the application’s needs, the party relying on the authentication can decide if an attached (platform) authenticator is enough or if an external (cross-platform) authenticator is needed. FaceID, TouchID, and Windows Hello would be examples of platform authenticators. YubiKey or other FIDO U2F security keys are examples of external (cross-platform) authenticators.
For this demo, we’re just going to require a platform authenticator:
var authenticatorCriteria = new AuthenticatorSelectionCriteria(AuthenticatorAttachment.Platform);
AuthenticatorSelectionCriteria also provides other options for configuration (Learn More).
With all of the options above in place, the resulting ‘Click’ handler will look something like this:
Once we’ve received the credentials from the client, we can perform some basic validation to ensure the registration information wasn’t “tampered with” (Learn More). For brevity, only a few basic validation techniques will be included in this demo. See this link for a complete list of steps.
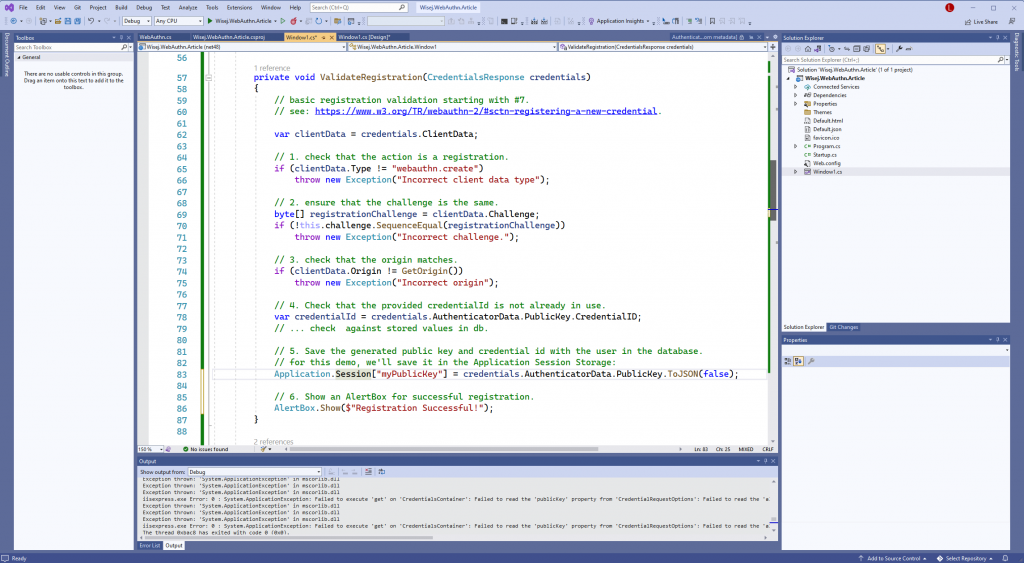
// 1. check that the action is a registration.
if (clientData.Type != "webauthn.create")
      throw new Exception("Incorrect client data type");
// 2. ensure that the challenge is the same.
byte[] registrationChallenge = clientData.Challenge;
if (!this.challenge.SequenceEqual(registrationChallenge))
      throw new Exception("Incorrect challenge.");
// 3. check that the origin matches.
if (clientData.Origin != GetOrigin())
      throw new Exception("Incorrect origin");
where GetOrigin() looks like this:
private string GetOrigin()
{
      string origin = $"{Application.StartupUri.Scheme}://{Application.StartupUri.Host}";
      var host = Application.StartupUri.Host;

      // localhost requires the port.
      if (host == "localhost")
            origin = origin += $":{Application.StartupUri.Port}";

      return origin;
}
// 4. Check that the provided credentialId is not already in use.
var credentialId = credentials.AuthenticatorData.PublicKey.CredentialID;
// ... check against stored values in DB.
// 5. Save the generated public key and credential id with the user in the database.
// for this demo, we'll save it in the Application Session Storage:
Application.Session["myPublicKey"] = credentials.AuthenticatorData.PublicKey.ToJSON(false);
Finally, we’ll display an AlertBox to show the successful completion of the registration request:
// 6. Show an AlertBox for successful registration.
AlertBox.Show($"Registration Successful!");
The ValidateRegistration() method looks like this:
and that’s it for registration!
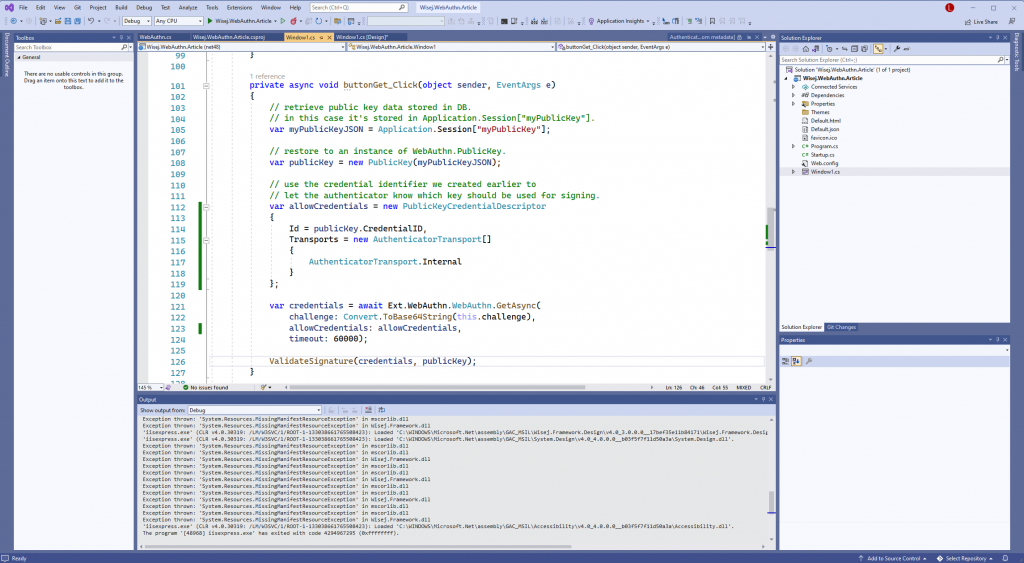
Now that we’ve saved the registration credentials, we can authenticate the user. Let’s go back to the Wisej.NET Designer and double-click the Get and Validate Signature button to create a `Click` event handler.
First, we will need the public key data we stored already. You’ll want to retrieve the JSON saved in the database for the user trying to authenticate.
// retrieve public key data stored in DB.
// in this case, it's stored in Application Session storage.
var myPublicKeyJSON = Application.Session["myPublicKey"];
// restore to an instance of WebAuthn.PublicKey.
var publicKey = new PublicKey(myPublicKeyJSON);
This time we’re going to use the Wisej.Ext.WebAuthn.WebAuthn.GetAsync() method to retrieve the credentials from the client browser.
GetAsync() takes three arguments:
Use the same steps listed in Generating a Challenge above.
The relying party can optionally specify a PublicKeyCredentialDescriptor to determine the type, identifier, and transport methods acceptable to the party (Learn More).
In this case, we want the client to use the credential generated upon registration:
// use the credential identifier we created earlier to
// let the authenticator know which key should be used for signing.
var allowCredentials = new PublicKeyCredentialDescriptor
{
      Id = publicKey.CredentialID,
      Transports = new AuthenticatorTransport[]
      {
            AuthenticatorTransport.Internal
      }
};
PublicKeyCredentialDescriptor also provides other options for configuration (Learn More).
When everything above is put together, it results in the following code:
The credentials received as part of a credential assertion request are similar to those retrieved during registration, except that the public key is not included and that a signature is included in the authenticator data.
Once again, we want to perform some basic validation to ensure the credential Get() request wasn’t “tampered with.” Only basic validation steps are included in this demo. See this link for a complete list of steps.
// 1. check that the action is a credential get request.
if (clientData.Type != "webauthn.get")
      throw new Exception("Incorrect client data type");
// 2. ensure that the challenge is the same.
byte[] registrationChallenge = clientData.Challenge;
if (!this.challenge.SequenceEqual(registrationChallenge))
      throw new Exception("Incorrect challenge.");
// 3. check that the origin matches.
if (clientData.Origin != GetOrigin())
      throw new Exception("Incorrect origin");
See above for the implementation of GetOrigin().
// 4. verify the relying party identifier is the same.
var hasher = SHA256.Create();

byte[] savedRpIdHashBytes = Encoding.UTF8.GetBytes(this.relyingPartyId);
var computedRpIdHash = hasher.ComputeHash(savedRpIdHashBytes);

var rpIdHash = authenticatorData.RPIDHash;
if (!rpIdHash.SequenceEqual(computedRpIdHash))
      throw new Exception("Incorrect RP ID");
// 5. verify the user is present.
var userPresent = authenticatorData.UserPresent;
if (!userPresent)
      throw new Exception("User not present");
The below code sample shows validation of an ES256 or RS256 signature. You can check which algorithm is being used with the PublicKey.Algorithm property.
// 6. finally, validate the signature.
var authBase64 = response.AuthenticatorData.Base64;
var clientBase64 = response.ClientData.Base64;
var signature = response.Signature;

var isValidated = Ext.WebAuthn.WebAuthn.Validate(
      publicKey: publicKey,
      authenticatorDataBase64: authBase64,
      clientDataBase64: clientBase64,
      signature: signature);
// show success or failure of signature validation.
AlertBox.Show($"Validation Successful: {isValidated}");
The ValidateSignature() method above results in the following:

The source code for this example can be found here.
A live demo of this application can be found here.