This blog article is part of a series of articles. If you missed the first part, you can view it here: https://wisej.com/blog/integration1/
In this part we will use some widgets from another quite popular Javascript library and show how easy, clean and straightforward the integration into a Wisej application works for them as well.
The widgets we cover here are part of the SyncFusion (www.syncfusion.com) suite. SyncFusion offers about 70 JavaScript controls that cover a wide range of functionality.
Let me start with a screenshot of the first tab page of my demo application:
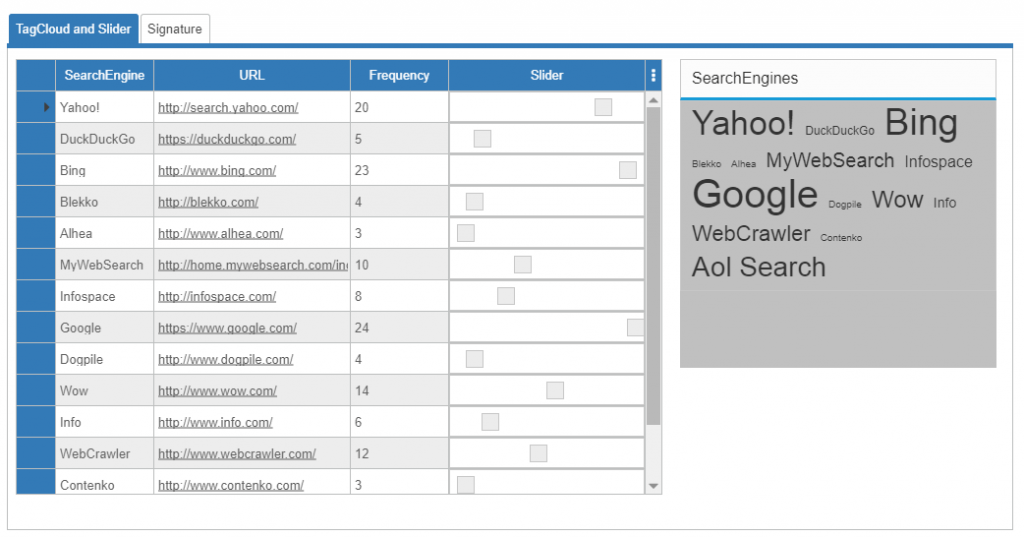
This screenshot shows a DataGridView on the left and a SyncFusion TagCloud element on the right.
The DataGridView is populated with (invented) demo data about search-engine usage frequency.
You can change the values either by editing directly in the frequency column or by using the slider in the column to the right. The slider embedded in the cells is also a SyncFusion widget.
When you use the slider, the frequency column value and the TagCloud are updated in real time. Accordingly the same happens with the slider and the TagCloud when you edit the frequency cells.
If you click on a link in the TagCloud the default processing (which opens the link in a new browser tab) is deactivated and we instead receive the click event and show which element was clicked (just as a sample to show how to interact with the TagCloud element from server side code).
Hands on
Lets take a look at the code and the way it’s implemented. The complete source code is available for download, see link at the bottom of this article.
The data
All data for the DataGridView and the TagCloud is provided by a shared BindingSource.
For simplification this is populated from a DataTable that we setup in InitSearchEngines():
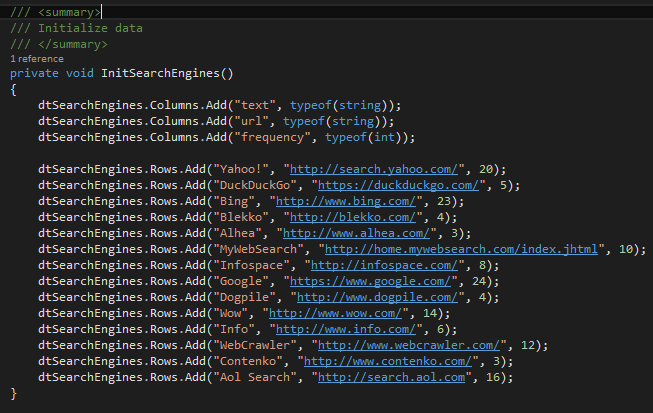
Please note that this data can be populated from any source that is available to your server (database, files, web services etc.)
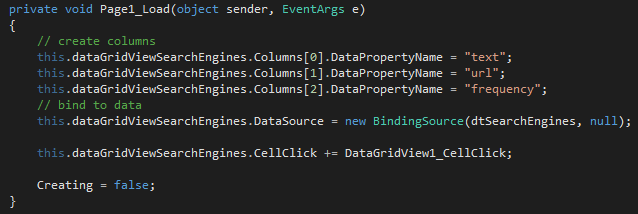
Binding the DataGridView
This is done in the PageLoad event handler. We are following standard .NET patterns and define the DataPropertyNames and assign the BindingSource as the DataSource.
Initializing the TagCloud
For the TagCloud we have defined the packages (css and js) that are needed. As explained in Blog Part 1 loading of those packages is handled by the Wisej package manager.
The second step that needs to be done to integrate the SyncFusion TagCloud widget is setting up the InitScript:
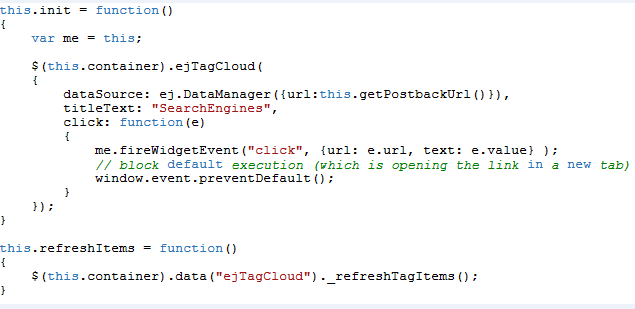
ejTagCloud is the name for the TagCloud class and we are using the SyncFusion DataManager to link the TagCloud datasource to server side processing by providing a PostBackURL. How this ends up on the server side will be shown later.
We further initialize the titleText nd define a handler for the click event that will also fire on the server side. Since we do not want to have the default processing (which is to open the clicked link in a new browser tab) we are calling window.event.preventDefault in the event handler right before sending the event to the server.
The client-side event handler picks out the clicked text and the underlying url from the event arguments that are available with the click event and sends them to the server along with the Wisej widget event.
Finally we declare a function named refreshItems that we are going to use to refresh the TagCloud when the datasource changes on the server side.
The server side
Now lets look at the server side code we are using.
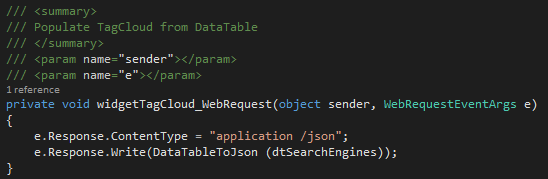
This function is called by the SyncFusion DataManager whenever the TagClouds needs data and is driven by the postback URL we have provided.
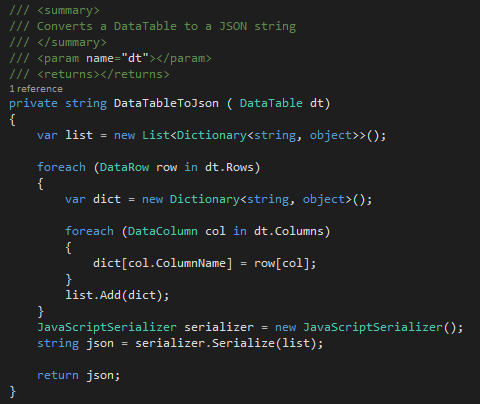
Our task here is to take the DataTable and pass it back as a json string. If your are familiar with C#, the function is pretty much self explanatory.
Now that the TagCloud is provided with data, what happens when a click event occurs?
This is determined inside the server side event handler:
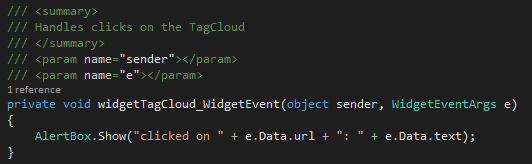
When the event type is “click” we retrieve the the url and text that have been passed in the event arguments and simply show an alert box with these values. Of course, the server side processing could be of any complexity including validations based on database queries or some other business logic.
Refreshing the TagCloud
Whenever the DataTable on the server side changes, we want the TagCloud to pull fresh data from the server. In on order to inform the client widget that it’s time to refresh (request a new data feed) we call the refreshItems function that we defined previously in the InitScript:
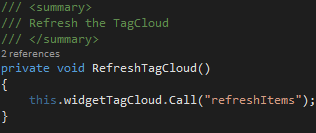
Please note that we are using Call instead of Eval here. Call simply calls a javascript funtion while Eval can be used to execute a script.
Modifying Data
As described above, there are 2 ways to modify the data that is used to populate the DataGridView and the TagCloud: Editing the frequency column or using the Sliders. We will explain both techniques and the corresponding code.
But lets first take a look at how the Sliders (which are not standard Wisej TrackBar controls) are added to the DataGridView. This is done once the binding of the DataGridView to the BindingSource is finished:
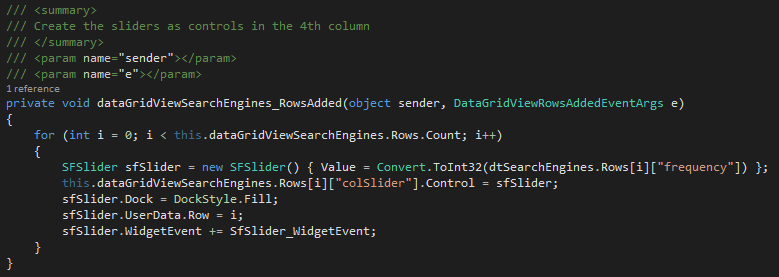
We then iterate through all rows and instantiate a SFSlider (read below) passing its initial value from the frequency column in the DataTable. This instance is then assigned to the Control property of the fourth DataGridView column (colSlider). For later reference we save the row number in the UserData of each SFSlider instance and we attach a widget event handler.
Wisej allows to virtually use any control inside the DataGridView cells (could also be in header or rowheader cells).
The SFSlider class
We already instantiated this class so it´s time to take a look at its definition:
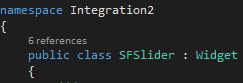
It´s derived from Wisej Widget class and we added two overrides to define the packages and InitScript. The packages are the same we used for the TagCloud, so when they are already loaded somewhere else in the application they won’t be loaded again. This of course also applies to the multiple instances of the SFSlider we are going to create.
In the InitScript you find a reference to ejSlider (the SyncFusion class). We also define the minimum/maximum value and the step to be used. The (initial) value is set from the Value property (that we are passing upon creation).
We also see a handler for the change event (where we pass the new value) and a function setValue that we can use to set the SliderValue from the server side.
Cell edits vs Slider changes
You can either edit the frequency cell value or use the slider to update the data used for the DataGridView and TagCloud
Editing the Cell
After a cell is edited a CellValueChanged event is fired in the DataGridView:
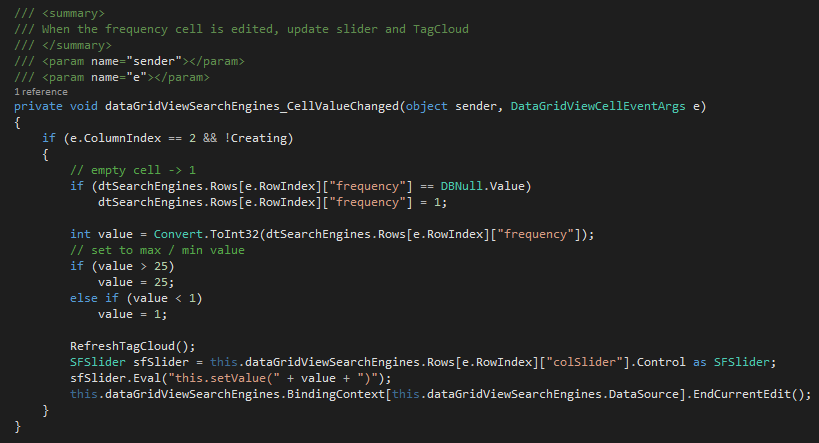
We check if it’s the frequency column that has been edited. Since it is bound to the DataTable we do not need to update the DataTable. So we can simply call the RefreshTagCloud that updates the TagCloud from the DataTable. We then determine the slider element in the same row and pass the value of the corresponding DataTable row to the slider calling the setValue function we have defined in the SFSlider InitScript.
Finally we end the current edit. (In a more complex application you could edit multiple columns, validate the data, write it to a database table etc.).
Using the Slider
When a slider changes its value, we fire a change event (see SFSlider InitScript) that is processed in the following handler:

In the case of a change event we query the row number of the Slider from its UserData. We then update the same row in the DataTable using the data that has been passed in the event args.
The DataGridView frequency cell does not have to be updated explicitly. This is done automatically by its binding to the DataTable. All that is left to be done is to refresh the TagCloud.
Side notes
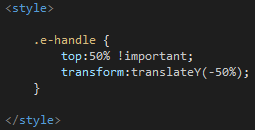
While using the SyncFusion sliders we have noticed that the slider handle is not vertically centered. We changed this by adding the following css code to default.html
Sign here…
Another nice widget from SyncFusion that can be integrated and used in a Wisej application is a Signature control (ejSignature).
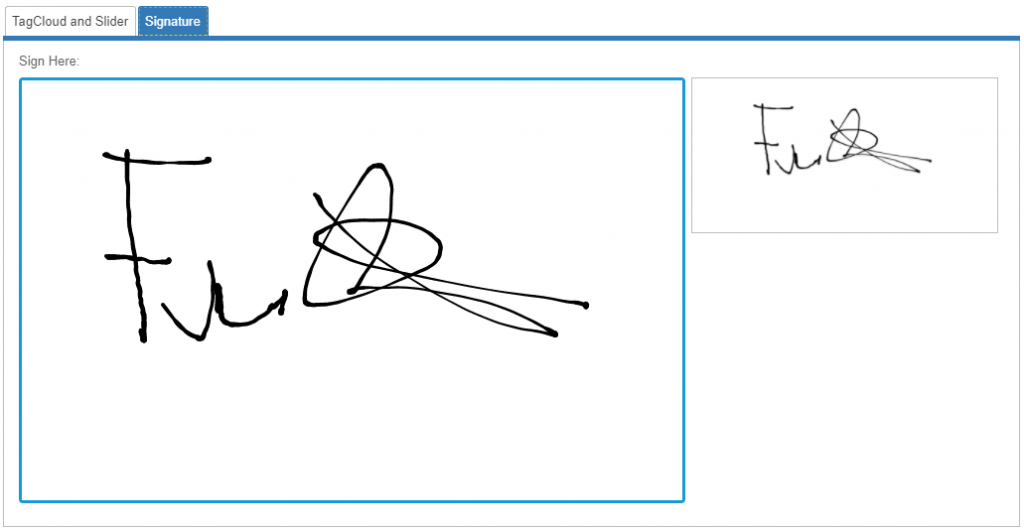
The demo window shows the Signature control and an image control that is used to display the contents of the Signature control simulating some server side processing.
For the packages we have used the same definitions we had for the TagCloud and Sliders.
The InitScript looks like this:
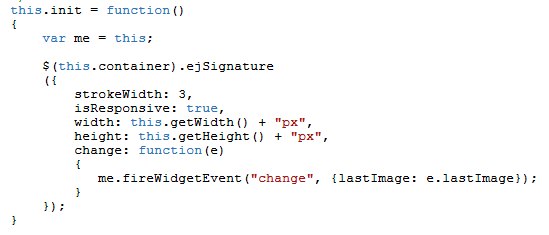
We set up some initial properties and define a change event handler that we pass the LastImage to.
On the server side we handle the change event and pass the image data to the OnSignatureChanged function.
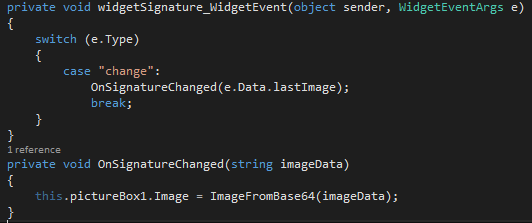
The OnSignatureChanged function could now perform any kind of processing (storing the signature in a database blob column, passing it to some other backend, etc.).
In our demo we simply want to display it in the image control. For this purpose we need to convert the base64 string to an image.
This is done in the ImageFromBase64 function:
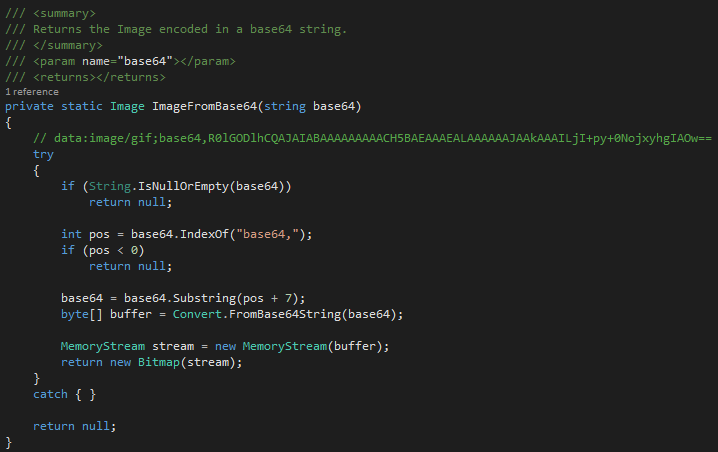
Nothing fancy here. You can see a sample of the data that is processed. We cut the prefix and create a byte array from the base64 string and finally a Bitmap from it through a MemoryStream.
Conclusion:
In this blog article we have shown how to tightly integrate 3 widgets from the SyncFusion into a Wisej application and how to bridge from client to server side and vice versa.
Watch out for more articles in this blog series covering useful and fancy widgets.